Enchilada Sauce & Mexican Egg Bake (Low Carb!)

1

Alright… so it’s been forever. I have a backlog of recipes and a camera full of food pictures. This particular recipe we cooked like three months ago. 🙂 But that doesn’t make it any less tasty!

So here you go!

Enchilada Sauce

  • Dice an onion, celery, and an Anaheim pepper, and sauté them in butter.
  • Mix your spices together in a separate bowl (cumin, chipotle powder, oregano, paprika, onion powder, salt).
  • Add in some diced tomatoes to the sauté pan (I only had cherry tomatoes, so I made it work).
  • Add in some minced garlic into the sauté pan.
  • Add in the spices and a liiittle bit of chicken broth.
  • Thicken with tomato paste.
  • Throw it all in the food processor to make it super smooth, then add more salt to taste.

Mexican Egg Bake

Because we were doing low-carb diet at the time, instead of actually making enchiladas, we made a sort of Mexican baked eggs dish, which is basically the enchilada sauce and an egg topped with cheese in a muffin pan. We had to eat it with a spoon out of the muffin pan so as to not break our runny yolks in transit to a plate (because that’s blasphemy!) but these are not too bad!!

Leave a comment

Filed under Uncategorized

Savoring San Diego

A few months ago (in April…I know…this is far from timely), I went to San Diego for a work conference, and Jonathan tagged along so we could make a vacation out of it. We had a blast! We rented a car (named her Carmen) and gallivanted around the town like a couple of energetic teenagers. The weather was incredible, the zoo was amazing, the people were so chill, and the beaches were absolutely beautiful. But, as always with our vacations, our favorite part was the food.

OH MY GOSH, the food.

Between the crazy-fresh seafood and the mouth-watering Cali-Mex, San Diego food knocked our socks off.

We never imagined it was possible to out-do Tex-Mex, but there’s something special about the border flavors of SoCal cuisine that truly blew Tex-Mex out of the water. I mean, can we talk about the enchiladas for a second!? They use a variety of cheeses, that enchilada sauce is like nothing I’ve ever tasted – fresh, tomato-y, just the right amount of seasoning and spice – and the corn tortillas are super fresh and soft. And the California burrito … whoever thought of putting French fries inside a carne-asada-and-shrimp-stuffed burrito is a genius in our book.

Also, let me just say. I am now officially a spoiled brat when it comes to seafood. Did you know that something as beautiful as a LOBSTER ROLL exists? Toasted buttery bread filled with chunks of lobster. I’ll just let the pictures do the rest of the explaining.

The best thing Audrey ate:

  • Fisherman’s torta & shrimp ceviche from Oscars Mexican Seafood
  • Lobster roll & lobster bisque from Bite of Boston
  • Parmesan Truffle fries from the Devilicious food truck

The best thing Jonathan ate:

  • California burrito from Roberto’s
  • Cheese enchiladas and carne asada fries
  • Tortillas and fried quesadilla from El Indio

1 Comment

Filed under Uncategorized

Beer Cheese Soup & Cheddar Apple Soup

Winter = Creamy cheesy soups galore!

I love soup, and Jonathan loves cheese. Even though he’s not a big fan of soup, he loves cheese more than most things in life, so these cheesy chowders were winners for both of us.

There’s really nothing better than a steaming bowl of creamy soup when it’s chilly outside. Except maybe blankets, cozy pajamas, coffee, a fireplace, and cuddling. But hot soup (served with an always-comforting loaf of crusty French bread) gives all of that a run for its money.

Soup is a funny thing. You can add so many ingredients and not really keep track of what all you threw in the pot. Maybe it’s just because I’m an amateur cook, but I find it so hard to write an accurate recipe for soup because the key to making it well is TASTING it constantly and adding layers of flavor over time according to how it’s turning out. (Yay — a good excuse to nibble and sample!!)

I’m not writing out entire recipes for these soups because I definitely wung it when I made them. Winged it? Wung it? You get the idea!

Beer Cheese Soup & Homemade Bread
(aka “The best cheese soup I’ve ever tasted!” – Jonathan)

1

2

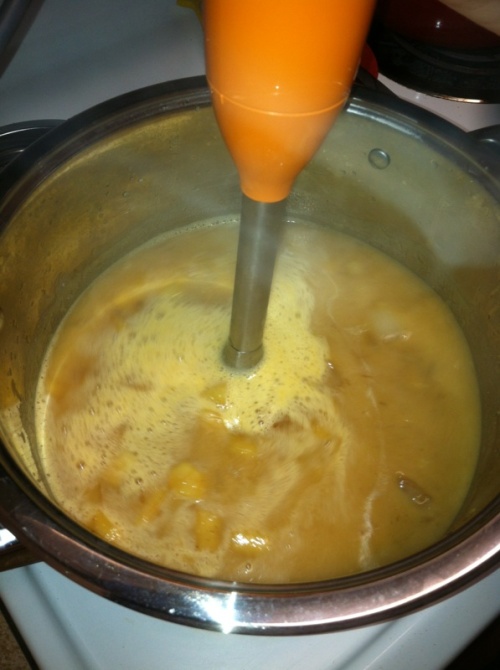
In a large soup pot, saute a few diced onions in butter. Make a roux, then add chicken broth, beer, and milk. Let it simmer for 10 minutes. Add grated cheese to the soup, whisking it in with each handful. Add a tiny bit of the Worcestershire and Dijon, tasting along the way. Add a couple dollops of sour cream and all the spices (go easy on the nutmeg). Add a bit of heavy cream to your liking, and blend the soup if you want it super smooth (it still tastes great it you don’t!) Add salt as necessary.

If you’re feeling ambitious, you can make your own homemade bread! But I shouldn’t have any authority over bread advice because I’m definitely not so great at bread-making yet! My loaf turned out very dense, which we actually liked, but you can probably do a better job with a Googled recipe!

3

Cheddar Apple Soup
(“Whoa, it’s sweet and savory at the same time!” – Jonathan)

1

In a skillet, saute a diced sweet onion and diced apples in butter.
I have potatoes in my picture above, but I never used them. It just didn’t feel right! If you wanted to use them, you’d probably throw them in at this point.

2

In a large soup pot, make a roux (with the ground mustard too), then add chicken broth and apple juice. Add the sauteed onions and apples to the soup pot. Let it simmer until the apples are tender. Add grated cheese to the soup, whisking it in with each handful.

It doesn’t look appetizing at this point, but just wait.

4

Add heavy cream and all the spices (go easy on the cayenne). Taste it and add whatever your taste buds tell you to (I added more apple juice and ground mustard at this point). Blend the soup if you don’t want it chunky. Add salt as necessary.

5

I toasted up a $1 loaf of French bread from WalMart. It was better than my homemade bread, in my opinion!

6

Garnish with green onions or fresh mint (I know that sounds weird, but it tasted great!)

7

1 Comment

Filed under Uncategorized

Poutine. A Delicious Delicacy from the North!

DSC01190

During your late night binges of Food-Network-watching or surfing the internet for new things to cook (or are we the only ones who do this??), you might’ve run across a delightful treat called poutine (pronounced poo-teen).

A common Canadian dish originating in Quebec, these French fries topped with cheese curds and a light brown gravy are rich and delicious.

What!? Brown gravy on fries!? … Don’t turn your nose up. Just trust us!

I (Jonathan) have always been curious to try poutine. Those who put in the effort to make it always say it’s incredible, and it’s just such a fun, party-style dish. After finally making some, I can safely say that poutine is definitely worthy of all the hype. It’s a dish I’d love to try again and again until I master it.

Think of it as the cheese fries of the great white North! You won’t be disappointed.

What You Need

  • 2 large russet potatoes
  • Cheese curds
    Tip: If you can’t find cheese curds (we couldn’t at the time), you can use fresh mozzarella pearls.
  • 1 cup flour
  • 1 stick unsalted butter
  • 3 cups beef broth
  • Beef bouillon
  • Vegetable oil (if you want to fry the fries instead of bake them)

What You Do

  1. Prepare your fries.
    A. Wash the potatoes well
    B. Slice them up, fry-style.
    C. Soak them in a bath of ice-water for an hour (or for as long as you can while you prepare the rest of the dish).
    Tip: If you choose to BAKE the fries, get them in the oven on like 450 degrees as soon as you can instead of soaking them so they can be cooking while you make gravy.
    DSC01194
  2. Make a light brown roux:
    A. Melt a stick of butter in a skillet or sauce pan.
    B. When the butter is bubbly, add flour to it.
    C. Whisk it, A LOT, over medium heat until a thick paste forms. Keep whisking it until it’s smoother. Whisk whisk whisk for like 10+ minutes. You want it to turn light brown.
    Tip: If you don’t whisk it enough over the heat, your brown gravy will be grainy.
    DSC01191
    DSC01193
    DSC01195
  3. Add beef broth to the roux and whisk it in.4. Add small amounts of bouillon and TASTE IT each time.
    Tip: Be CAREFUL because it’s easy to make it too salty fast. Taste it OFTEN.
  4. Dry the fries by putting them on paper towels and removing the excess moisture.
    DSC01200
  5. Cook the fries. You can either fry or bake them.
    Tip: We fried them in vegetable oil, but in hindsight, we would bake them. RESIST the urge to salt the fries. I made this mistake; just don’t do it. The beef gravy will be salty enough.
    DSC01203
  6. Put it all together!
    A. Place the fries on a large platter.
    B. Distribute the cheese curds evenly over the fries.
    C. Cover with gravy.DSC01201
    DSC01209
  7. EAT (and appreciate Canada a little more than you did before).
    DSC01205

PS. I sauteed some baby portobello mushrooms with butter and salt to have with our poutine. There aren’t a whole lot of things better in this world than buttery sauteed mushrooms. The trick is to give them a lot of room in the skillet (even if you have to cook them in several batches) and not keep a lot of moisture in the pan while they cook.

DSC01196
DSC01198
DSC01202

DSC01208

Leave a comment

Filed under Uncategorized

Gourmet Macaroni & Cheese. The Way to a Man’s Heart.

DSC01346

When we were dating, I remember when Jonathan said, “Audrey, if you ever made a gourmet macaroni and cheese for me, I would fall even more in love with you.” I think my response back then was, “K. Or… you could just make it yourself and love me more anyway!”

But my ole heart got to thumpin’ one day recently, and I decided to make him the most creamy, silky, decadent batch of cheesy noodles he’d ever tasted.

What You Need

((Remember that this isn’t exact and is more like an outline that’s meant to encourage your creativity…. I’m helping you embrace your inner chef!))

  • Cheeses of your choice.
    Tip: I was going for a mild cheese combo, so I used medium cheddar, Swiss, provolone, some random, soft white cheese from Central Market, and a little bit of crumbled blue cheese. If you want a deeper more potent flavor, go with a combination of cheeses like Parmesan, Asiago, Romano, Gruyere, sharp white cheddar, etc., but mix them in with milder cheeses too.
  • 1 box elbow macaroni
    Tip: Get the kind with ridges because they hold onto the cheese better!
  • 1 white or yellow onion
  • Salt and pepper
  • Paprika
  • Garlic powder
  • 2 cups whole milk
  • 1 stick unsalted butter
  • 1 cup flour
  • Breadcrumbs
  • Parsley

What You Do

  1. Cook and drain your pasta.
    Tip: Remember to add salt to the pot while the pasta is cooking.
  2. Dice the onion, sauté it in butter, then transfer it to a large pot.
    Tip: I skipped a step and kept the onions in the skillet while making roux. Probably not Emeril-approved, but it worked great for me!
    DSC01348
  3. In the same skillet (unwashed after cooking onions), make a blonde roux:
    A. Melt a stick of butter.
    B. When the butter is bubbly, add flour to it.
    C. Whisk it, A LOT, over medium heat until a thick paste forms. Keep whisking it until it’s smoother and thinner. Whisk whisk whisk it over the heat for like 5-10 minutes. You want it to turn just slightly blonde colored.
    Tip: If you don’t whisk it enough over the heat, your whole dish will be grainy.
    DSC01350
  4. Transfer the roux to the large pot with the onions.
  5. Add milk, and whisk it all together.
  6. Over medium heat, slowly add the cheeses and stir them in with a spoon.
    DSC01352

    DSC01354

  7. Add salt, pepper, paprika, and garlic powder to taste.
  8. Add the pasta to the large pot.
    DSC01359
  9. Chop the parsley.
    Tip: I usually always hand-chop fresh herbs, but parsley is a more resilient one that can really take some processing without losing its integrity!
    DSC01364
  10. Prepare the breadcrumbs.
    Tip: You can just buy store-bought if you want, but I put some French bread in the food processor and then toasted the crumbs in a skillet. I added a tad of dry Ranch seasoning to the breadcrumbs for an extra pop of flavor on top.
    DSC01358
    DSC01363
  11. Distribute the macaroni and cheese to serving dish(es).
    DSC01367
  12. Cover it with breadcrumbs and chopped parsley.
    Tip: I prefer un-baked mac and cheese because it doesn’t dry out. If you like yours a little less saucy, bake it!
    DSC01373

BTW. Macaroni and cheese pizza … to die for! You can throw some on a tortilla with some alfredo sauce and bake it, but if you happen to have some leftover cheese pizza (with alfredo sauce instead of marinara), jazz it up with some of this magical macaroni and pop it in the oven. Best. Idea. Ever.

DSC01401

6 Comments

Filed under Uncategorized

Honey-Roasted Peaches with Mascarpone & Walnuts

DSC01247

This light, summery dessert is quick and delicious. It may be the simplest recipe we ever post.

Neither of us really has a sweet tooth, so desserts just don’t happen in our home very often. I’m actually a sucker for some juicy peaches mixed with cottage cheese, so it took me a while to devote some of our peaches to this dessert idea, but once we finally did it, it was so tasty we ended up making it twice within a couple weeks.

What You Need

  • Peaches
  • Honey
  • Butter
  • Chopped walnuts (or almonds, if you prefer)
  • Mascarpone
    Tip: The first time we made these, we used BlueBell homemade vanilla ice cream instead. As much as we love us some BlueBell, the mascarpone just complemented the peaches so much better.

What You Do

  1. Preheat the oven to 400 degrees.
  2. Slice the peaches in half and pick out the pits.
  3. Line them on a baking tray or in a big casserole dish.
    Tip: The first time, we put the peaches in a muffin tin and it didn’t turn out like we wanted it to… I don’t recommend it.
  4. Fill each half-peach with honey, letting it overflow a little.
  5. Put a pat of butter on top of each half-peach.
    DSC01250
  6. Roast them for about 30 minutes.
  7. Let them cool off just a little bit and plate them one at a time.
    DSC01251Tip: The pink “syrup” that collects at the bottom of the pan is like the nectar of the gods. Spoon some of that goodness on your plate.
  8. Put a heaping spoon of mascarpone on each half-peach.
  9. Sprinkle the chopped walnuts on top.
  10. Enjoy!

DSC01254

DSC01255

2 Comments

Filed under Uncategorized

The Shooter Sandwich. A Sandwich of Epic Proportions.

DSC01312

Ok y’all, prepare yourselves. This is more than just a sandwich. It’s a meaty, bread-y, cheesy MONSTER meal. Intimidating, yes. Delicious, yes. Easy to make, no. Easy to bite into, no. But worth all the trouble, YES.

Essentially a bowl of carbohydrates packed to the brim with protein, this sandwich was originally made for high-class people out on long hunting trips. It was known to travel well because its fillings are totally encased by the crusty bread. And after being squished in a saddle bag for hours, the flavors would meld together and make that signature “shooter sandwich”.

DSC01374

When Jonathan first discovered this king of all sandwiches, he knew it would one day grace our kitchen and our stomachs. He researched his options, planned the details, and was all smiles when he talked about this culinary project for weeks.

He even drew a diagram of the various layers and discussed assembly techniques. (It was confirmation that I’d married the right man!)

Then, shooter sandwich weekend finally arrived. We grocery shopped, cleaned and prepped the food, weaved a mighty-fine bacon blanket, cooked, assembled layers, smashed the sandwich under 60 pounds of weight for 12+ hours, toasted it, and FEASTED.

The whole process is pretty time-consuming, but it was absolutely worth it, if for no other reason than for the experience of making it together. On top of that, it was actually pretty decent tasting.

What You Need

  • 1 big bowl-shaped crusty bread loaf
  • 1 white onion
  • 1 package of mushrooms
  • 1 clove of garlic
  • 1-2 tbs olive oil or butter
  • Mayonnaise
  • Whole-grain mustard
  • Horseradish
  • Sliced provolone and Swiss cheese
  • 2 NY Strip steaks
  • 2 Rib eye steaks
  • 1 pack of bacon
  • Steak seasoning
    Tip: Be careful about the amount of salt you use during prep of each sandwich layer. Ours was a tad too salty because we salted the mushrooms AND the steak.

What You Do

  1. Hollow out the bread: 
    Slice off the top of the loaf, scrape out the guts, and then put the hollow bread bowl on a big piece of foil. Lay the top of the bread bowl aside.
    Tip: Be sure to leave enough bread on the bottom to the juices don’t soak through it.
    DSC01314
  2. Prep the bacon weave: 
    Weave the bacon together into a solid sheet of bacon and bake it in the oven.
    DSC01316
  3. Prep the veggies: 
    Chop the onions and mushrooms and sauté them in olive oil. Add some minced garlic at the end, if you want to.
    Tip: Use a paper towel to soak up any extra moisture from the mushrooms in the pan after they’re done cooking. It will make your sandwich soggier if you don’t!
    DSC01326
  4. Mix up the condiments: 
    Stir the mayonnaise, mustard, and horseradish together in a bowl and set aside.
  5. Cook the steaks:
    Sear the steaks and cook them to barely medium rare (they’ll cook more in the oven later).
    DSC01324
  6. Put it all together: 
    Assemble the fillings inside the hollow bread bowl.
    Tip: Our layers, from bottom to top, were: Bread bowl, mayo mixture, rib eyes, provolone cheese, bacon weave, mushrooms & onions, Swiss cheese, NY strips, mayo mixture, bread top.
    DSC01329
    DSC01331
    DSC01332
    DSC01334
    DSC01337
    DSC01338
  7. Wrap it up in a lot of foil.
  8. Smash It:
    Balance as much weight as you can figure out how to on top of the sandwich for 5+ hours.
    DSC01341
    DSC01356
  9. Bake it at 350 degrees for 30 minutes.
  10. Slice it like a pie and eat it.
    DSC01378
    DSC01381
    DSC01379
    DSC01376

Our Final Reviews:

Jonathan: “It was like a Godzilla of culinary greatness. Its sheer massiveness and creation is a spectacle, and it’s exciting and grandiose, but then as you eat it, it is so large and lumbering that it can be pretty awkward to eat. I’d like to try it again except maybe a muffalata version!”

Audrey: “I was skeptical about it from the beginning because I prefer to eat my steak juicy, fresh, and with a knife and fork. But I actually wasn’t totally disappointed with it. It was full of flavor and just really unique. I’m excited to try a different version of it, though, like an Italian shooter sandwich with marinara, Italian sausage, eggplant, and mozzarella!”

♪♬♫♩ “Shot through the heart, and hunger’s to blame.
You give the sandwich… a bad name!” ♫♩♪♬
(Jonathan’s ode to the shooter sandwich)


4 Comments

Filed under Uncategorized

Brazilian Cheese Bread. The Cure to Your World Cup Hangover.

DSC01224

Brazilian cheese bread (aka Pão de Queijo) would’ve been culturally perfect to pop in your mouth while watching all the soccer in Brazil, but now they’ll help fill the void in your life that is the World Cup’s end.

One of our favorite restaurants is a Brazilian steakhouse. We don’t go often because they’re pretty darn pricey, but it’s a real treat when we finally splurge on the all-you-can-eat meats, gourmet cheeses, roasted sweet pineapple, and fancy-schmancy salad bar items. It’s pure meaty extravagance. Depending on the steakhouse, there are between nine and seventeen different cuts/types of meats brought hot off the charcoal grill to your table on big skewers by gauchos/servers, who carve the perfectly-seasoned meats right onto your plate. It’s luxurious.

We tend to fill up on meat and not get our fill of the goodness of the complimentary cheese bread. To counteract the feelings of cheese bread deprivation (an ultimate first world problem) in the future, I decided to learn how to make my own Pão de Queijo at home so we could have our fill of it before our next trip to meat heaven.
This recipe has become my latest obsession. (I mean look at them… can you blame me!?)

Finished Product.

So, as much as we love that skewered meat, we’re here to tell you about these crispy-on-the-outside, gooey-on-the-inside, warm, flavorful, airy, addicting puffs of Brazilian cheese bread that will make you want to dust off your mixer and give ’em a try.

What You Need

  • 1 cup whole milk
  • 1/2 cup vegetable oil
  • 1 teaspoon salt
  • 2 eggs
  • 1 – 2 cups Parmesan cheese, depending on how strong you want it to taste
    (I’ve also used Asiago and Romano. All good choices.)
  • 2 cups tapioca flour or sour cassava flour
    (Sour cassava or sour tapioca flour is difficult to find … we’ve only ever been able to get our hands on regular tapioca flour, which lacks the slightly sour, fermented flavor, but it still gives you that gooey texture you want. You can find Bob’s Red Mill tapioca flour at most natural foods stores.)

What You Do:

  1. Preheat the oven to 450°F.
  2. Line a baking sheet with parchment (or cooking spray) and set aside.
  3. Prepare a heavy-duty stand mixer with a kneader attachment.
  4. Grate the cheese and set aside.
    DSC01152
  5. Combine the milk, oil, and salt in a saucepan and bring to a gentle boil over medium heat.
    DSC01227
  6. Pour the hot milk mixture into your mixer and quickly add the tapioca flour (mixer on low). Scrape the sides of the mixer as needed.
    Tip: The dough is sort of gelatinous when it’s mixed well. It’s weird looking. Don’t get nervous.
    DSC01230
  7. Beat the eggs into the dough (mixer on low).
    Tip: You’re kind of supposed to cool the dough off before you add the eggs, and whisk the eggs together in a small before before adding them, but I just crack them into the mixer when the dough’s hot and it’s always worked out wonderfully for me. I’m always a fan of fewer steps if the result is the same level of delicious.
  8. Beat the cheese into the dough (mixer on medium) until evenly incorporated.
    Tip: The dough is now super-sticky, stretchy, and gooey.
    DSC01237
  9. Use an ice cream scoop or spoon to portion the dough into small balls about an inch apart on the baking sheet/muffin pan.
    Tip: You can dip your scoop in water or spray it with cooking spray occasionally to prevent the dough from sticking to it.
    DSC01238
  10. Bake those bad boys!  Immediately turn down the heat to 350°F and bake for 25-30 minutes, until the balls are puffier and the outsides are JUST starting to color.
    DSC01240
  11. Let them cool for a couple minutes and then eat ‘em while they’re warm… they’ll never taste better than fresh out of the oven!
    DSC01245

Leave a comment

Filed under Uncategorized

Balsamic Bruschetta. You won’t regret it.

There’s something about ripe, juicy tomatoes that just says SUMMER.

Jonathan and I are both big fans of the tomato, so when we’re craving something light & fresh but packed with flavor, our go-to recipe is balsamic bruschetta.

DSC01119

I kind of stumbled upon creating this bruschetta during college when I wanted to replicate the fancy $8 appetizers from Italian restaurants but for A LOT cheaper. Because I could pick and choose exactly what I wanted in mine, I was blown away at how much BETTER it was than any I’d had before.

Confession: I say the word recipe, but I’ll go ahead and let you in on a little Lange kitchen secret… We don’t really follow recipes for anything other than baking. We MIGHT glance at one and get an idea of what all goes in something, but for the most part, we mix, sprinkle, stir, sample, and repeat until the dish tastes just right. You’ll just have to embrace our lack of exact amounts and measurements.

With that said, I encourage you to not follow my recipe exactly if when you decide to make this. Let it really be your own; if you want it more tomato-y, throw in more tomatoes! If you want it more acidic and strong, douse it with more balsamic vinegar! You get the idea.

What You Need

* The ingredient amounts I use here make enough for a whole big family (or two really hungry people).
* The beauty of this recipe is that everything is FRESH. Don’t make a mistake by taking shortcuts and throwing in dried basil or minced garlic. Trust me.

 Bruschetta:

  • Tomatoes (maybe 8-ish Roma or the equivalent amount of any kind you want)
  • Red Onion (1 medium to large)
  • Garlic cloves (maybe 3 cloves, and it really needs to be fresh)
  • Fresh basil (like, the equivalent of a few handfuls. And yes, it HAS to be fresh!)
  • Olive Oil (it’s up to you how much)
  • Balsamic Vinegar (eyeball it, and be careful.)
  • Salt and fresh-ground pepper (like 4-5 pinches of each)

Toasted “Croutons”:

  • Bread of your choice (we like a simple Italian loaf)
  • Italian seasonings

Optional:

  • Fresh mozzarella cheese or some shaved parmesan cheese
  • Fresh lemon juice for the bruschetta

What You Do

  1. Preheat your oven for the bread.
  2. Slice and dice the tomatoes and onions into a big bowl.
    [I like them diced really small, but DON’T put then in a food processor because you really want to keep the integrity of the tomato flesh and onion.]
  3. Mince the garlic and add to the bowl.
    [DON’T use a jar of minced garlic. Just don’t do it.]
    DSC01128
  4. Slice and dice the fresh basil and add to the bowl.
    [If you kind of ball it up first, it’s so much easier to handle and cut.]
    DSC01130
  5. Add some salt and fresh-ground pepper to taste.
    [I am a salt fanatic so I probably over-do it, but you will really need quite a bit.]
  6. Add some olive oil and vinegar. And here’s where you can add some lemon juice if you want.
    [Taste test it! You want it to taste just right for YOU, so splash a little, stir, taste. Splash a little more, stir, taste. We like our bruschetta really juicy, so we always put extra olive oil and vinegar, but just cut down on the olive oil if you’re aiming to make it a little healthier.]
  7. Stir it all up!
    DSC01131
  8. DSC01133Slice up your bread and lay it on a baking sheet.
  9. In a little bowl, mix some olive oil and Italian seasoning, then drizzle some of this mixture on each piece of bread.
    [You can skip this step if you want to save some calories … it won’t make a HUGE difference.]
    DSC01125
  10. Toast the bread until it’s however you like it.
    DSC01126
  11. Slice some fresh mozzarella, if you want to.
    [Jonathan likes to melt his cheese on his bread in the oven. I like it better cold and on the side.]
  12. ENJOY!DSC01137

Confession: We turn this “appetizer” into our entire meal. We usually just make a huge heaping bowl of this stuff, toast up the croutons, slice some fresh mozzarella cheese, and we are good to go. Sometimes we even just eat out of the same giant bowl to save on dishes. Don’t judge.


3 Comments

Filed under Uncategorized

Hey good lookin’, whatcha got cookin’?

Hey y’all. Here’s the deal.

Today is mine and Jonathan’s 5-month anniversary! And in honor of that, we’re making today the grand opening of our little family food blog!

We love to cook. We love to eat. I love to write. You love to read. It’s a good combo. Let’s do this.

After we’d been dating for a year or so, Jonathan said, “Your food taste compared to mine is like Shakespeare compared to Twilight.” I like unique cheeses, exotic vegetables, and sophisticated flavor profiles; he likes Kraft cheese, fried food, and Whataburger (ok, so those can be delicacies too…).

We want to give you a realistic peek into our pantry, from the classy cuisine to the not-so-classy (but crazy delicious) combinations that happen in our kitchen.

We tried out all kinds of clever culinary blog names, but we finally decided that we should build onto my existing blog so that we can keep it all in one place. Who doesn’t like travel, regular life, AND food!? I mean really.

And, yet again, the transition in content doesn’t really call for a new name. We present to you… Double Dutch Diaries. Double (the household has doubled) Dutch (the makers of some of the best cheese and chocolate on the planet) Diaries (still a blog…). 🙂 Jonathan put up a good fight to call it Double Dutch Oven Diaries, but I told him I get enough of that in real life.

So, welcome friends! Put on your bibs and pick up your forks. We’re preheating the oven.

Stay tuned (and hungry)!

………………………………………………………………………………………………………………………………………….

What’s on the menu for you to look forward to …
1.) Jonathan’s Quest for Quality Poutine
2.) Audrey’s Newest Obsession (Brazilian Cheese Bread – Pao de Queijo)
3.) Our Go-to Appetizer (Balsamic Bruschetta)


5 Comments

Filed under Uncategorized